Benutzer-Werkzeuge
Inhaltsverzeichnis
Unit 6 Displaying
Presentation as pdf: displaying.pdf
Presentation as pptx: displaying.pptx
Multi screen
Introduction
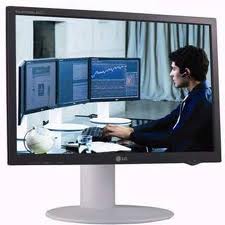
‘’When size does matter’’ – a multiscreen setup allows you to partition and display your content on several monitors or projections, so that it feels like on one big screen. The image sets split up and displayed on two screens. Multimonitor is also called multi-display and multi head,the use of multiple physical display devices such as monitors, televisions and projectors, in order to increase the area available for computer programs running on a single computer system. The use of two or many displaying is called multiscreen.
Scope of multiscreen
The scope of Multiscreen is seen in every field. There are different tools that help to multiscreen on different device. This technology helps to increase the efficiency and correction in the field. Researchers are using to do multi tasking with the help of Multiscreen.
According to http://en.wikipedia.org/wiki/Multi-monitor ,shows that depending on the type of work, multi-head may increase the productivity by up to 40-50%.
The multiscreen, used in general field http://www.silverpop.com/Documents/Whitepapers/CoreMotives/CoreMotives_Multiscreen-Email-Design-Across-Devices.pdf
Multiscreen using VVVV
VVVV is a toolkit for real time video synthesis and connecting physical devices.Here for using Multiscreen we use the live integration of Directx Shaders of any patch, and clustering for the multiscreen system using Boygrouping, Networking and Clustering. Boygrouping allows us to replace one single object on the server with a group of objects running on the clients doing all things and synchronization. The ability to control which data needs to pass the network allows for strong synchronisation of multiscreen setups over traditional tcp/Ip networks.
Networking can be done through Ethernet. Wifi is not preferred as the number of computer connected the efficiency gets decrease.
For Clustering, vvvv supports standard protocol such as TCP; UDP or RS232(for communication with other computers and software)
Application of Boygrouping are usually multi screen systems and seamless multi projection.
Any patch that is running on one computer can be shown in two different computer by using this method.
The general procedure to connect the patches to run in two or more computers, is listed below. Hardware Setup. One dedicated server PC,and any number of clients pcs connected via Ethernet.
Preparation for the Server. The node with Boygroup has 8 inputs node and 4 outputs node. First node from the left should be connected to the IP address of the clients. It can done manually. Preparation for the Client The client side of patch is easy.No patch needs to be done. all we have to start is like: vvvv.exe/client 192.168.0.100 here, the above ip address 192.168.0.100 is the ip address of your server.
Resources
Further information on Research on MultiScreen:
LINKS
https://www.youtube.com/watch?v=BdjiRpw1rkU
Companies that helps to install multi screen http://www.mmt.io/products/
The research paper,using the use of internet based functions with large TV, connected another screen multi screen. http://www.smartclip.com/download/multiscreen_ctv_study_EN.pdf
video of interactive 360 ° light field display. https://www.youtube.com/watch?v=8gvPS1m40gw
Example of VVV using multiscreen : https://vimeo.com/3200490
And another https://vimeo.com/5422109
Texturemapping on plane surfaces
Introduction
In modern age, the use of computer graphics is vast. Daily life to Industrial sector, we see the variety of use of computer graphics. For graphical representation, in many sector they use texture mapping to represent textures simply and easily than in Geometric way. Texture mapping is easier and cheaper than is Geometric model. For interactive computer graphics , texture mapping is used, as example, Blender, Maya, 3DS Max, OpenGl etc. Texture mapping also used for projecting images.
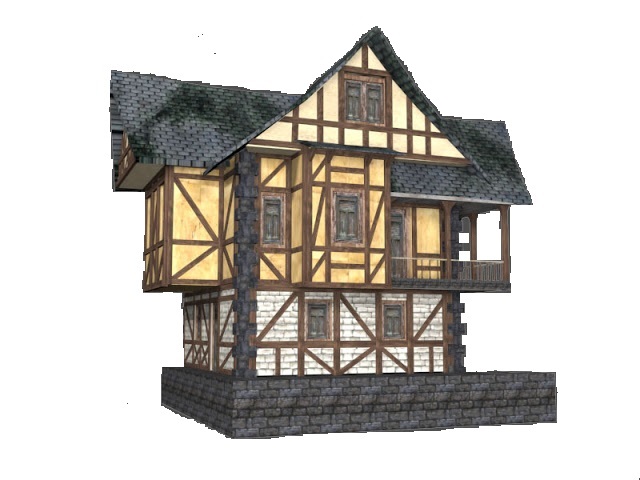
Texture mapping
Texture mapping is a method for adding surface details like color, images to computer graphics or 3D model. It is an element of Two-dimensional and Three- dimensional design and is distinguished by its perceived visual and physical properties.
Texture mapping examples below:
Texture
In the visual arts, Texture is the perceived surface quality of a work of art. Texture is an element of Two-dimensional and Three-dimensional design. It is distinguished by its perceived visual and physical properties. It describe color variation.
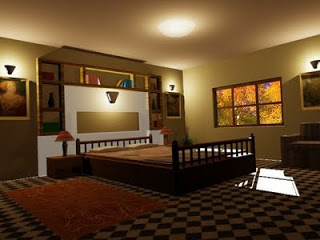
Advantages
Texture mapping is used for High quality images in computer graphics. The speed of rendering be faster using texture mapping.
Drawbacks
While rendering, rounding error occurs in computer graphics for texture mapping. Property viewing is another drawback of texture mapping.
Setup for VVVV
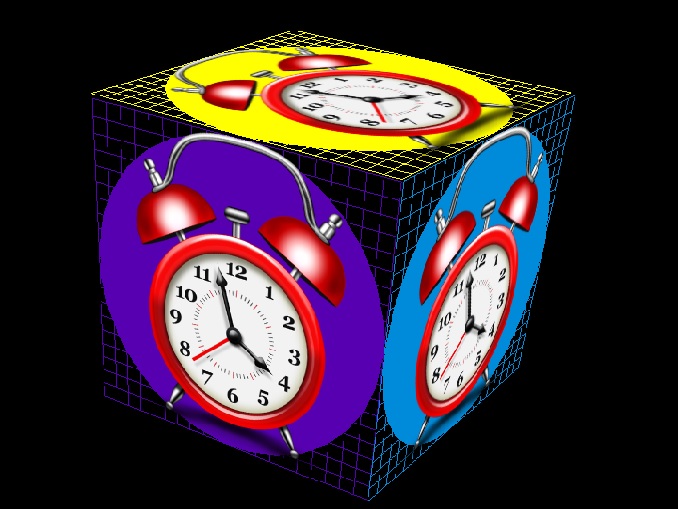
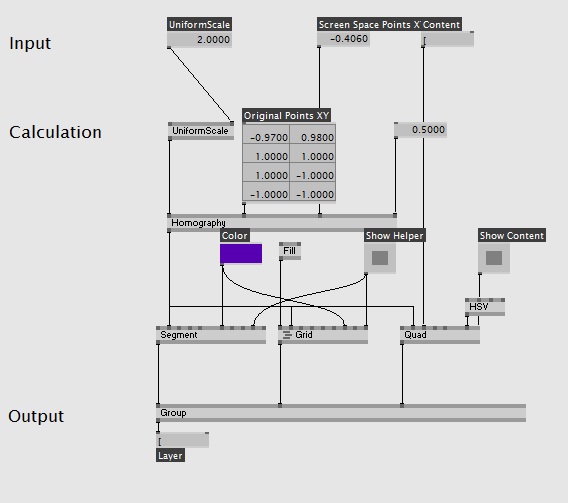
In vvvv setup, we have to set x, y coordinates then point this coordinates on screen and have to convert x, y coordinates point to vector coordinates point and rendering to see the mapping image. Vector node is used to build vector from its Cartesian coordinates. Undistort is used to undistort texture from the values of Undistort nodes. The original point of xy is in Undistort and it consist Segment for texture transformation. File texture consist the clock image which is mapped on plane surface.
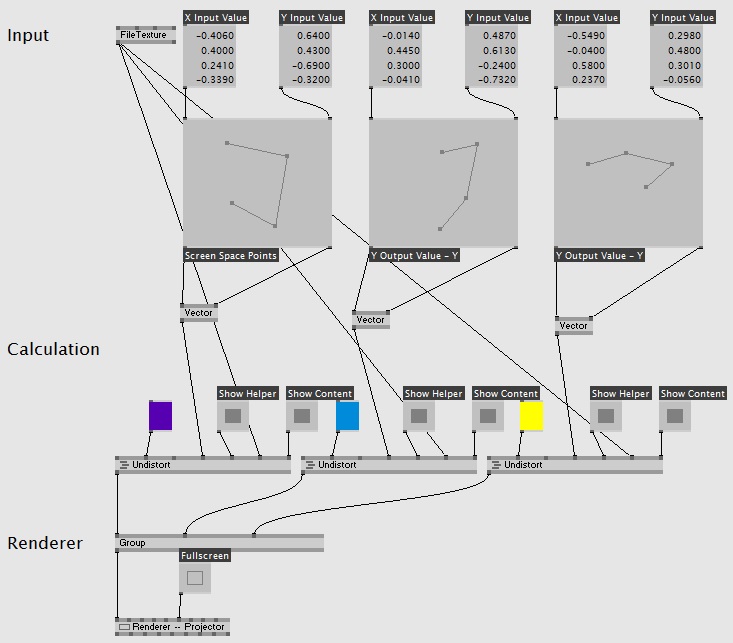
Rendering output of Mapping Image
Texture Undistort patch
Demo Patch
The demo patch for Texture mapping on plane surfaces texturemapping.zip
Video Examples
Watch the video for live show of 3D Image Mapping https://vimeo.com/72685642
Sources:
http://en.wikipedia.org/wiki/Texture_(visual_arts)
http://en.wikipedia.org/wiki/Texture_mapping
http://vvvv.org/documentation/vector-%282d-join%29
http://vvvv.org/documentation/undistort-%28ex9.effect%29
3D Projection Mapping
 Presentation slides: 3d_projection_mapping_16-9.pptx
Table of content
Introduction
3D Projection Mapping 1), earlier called spatial augmented reality is a technique for pixel-perfect lightning and projection of visualization’s, images or videos shown on several objects. Its main purpose is, to create 3D illusions in space and bring them to “life” (houses bend or fall apart, 3D objects move toward the viewer, etc.). Independent what kind of objects are used for the projections, for example plane surfaces, especially arranged (unregularly) objects or complex building facades, there are no limits for the installations. In addition to the projection, sound elements are used, to emphasize the perfect illusion.

Usage
 A widely spread use for projection mapping is found at music events. Especially EDM (electronical dance music) profits from the combination of music and visualizations. The visuals are synchronized with the played music and create a new experience for the customers. But it became very common for special occasions and events as well, so for example a 30min long show was projected on the Eiffel Tower in France on the French national day in 2009, see the Video example section below. Another purpose of projection mapping can be found in commercial advertising. Further, more and more projection applications are used in museums and exhibitions. The main profit for them, is the combination of projections with different sensors. So it is possible to create a complete new experience for the visitors, who pass for example the hallway and can interact with the shown content. So more or less, projection mapping can be used for advertising, live concerts, theater, gaming, computing, decoration and anything else you can think of.
History
One of the first public presentation is dated back to 1969. Disney created a special effect show for their Haunted House Mansion opening in Disneyland. Singers were recorded and later on, the video was projected on the statue busts. This method became very popular, because of its great effect of bringing fixed objects to live2).
 Another known example, from the installation artist Michael Naimark, dated back to the 80s, is his room projection. He recorded a typical American countryside room with two actors. Later on, the whole room was painted white to create a plane background for the projection.
The recorded footage was projected in the room with a camera on a moving plate, which turned slowly around 360°. The room looked with the projection as it was before, only the actors looked like ghosts in the installation.
Requirements
Fort the smallest possible setup a computer, projector and the recommended software is needed. Through the last years more and more software is provided, which can easily be used to get a good start for the setup. We will focus on vvvv but of course other software is provided as well, depending on the main use, other software could fit more for the needs of the artist. For music, several video jockey (VJ)3) software, enables a very fast combination of visuals and music. http://resolume.com/ For the projections a beamer is always necessary, which meets the required resolution. For very big installations it is common to use several beamers, especially if an object is projected from two different sides or angles. The second VVVV patch will demonstrate such a setup. VVVV provides a very good base for working with visualizations and calibrating one or more projectors. In the following sample patches, we will go through important nodes and discuss the relevant options.
VVVV
We will start with the general setup in vvvv provided from the vvvv book, then take a look on how to create a 3D environment in vvvv and last but not least, how a setup can look like, if two or more projectors are needed.
 The first patch, taken from the vvvv book4), shows you a general setup for a 3D projection on a cube. With the control view, it is possible to check what exactly the projector is showing. The main difficult at the beginning is to calibrate the projector. Only from the direct view from the projector the picture is undistorted. But if the viewer stands in another angle, the projection will look distorted. To avoid that, it is helpful to create a spectators view as well, which will show the end result from the viewer’s perspective.
The orange lines show the beamers position, the yellow one, the spectators view.
So the first step is to calibrate the projector. In the demo patch, the Renderersetup subpatch is the most important. Inside it, both projectors setups can be modified to fulfill the necessary adjustments. One is for the projectors view, the other one for the spectators view. The most important options, are the Projectors: width, height, depth and the Lens: Radius, depth and position. Of course it could be necessary to adjust other values as well, but for the start, this would be the main options. Depending on the beamer, the shift values and the aspect ratio could be important as well.
Further on, the object or environment used, should be reconstructed in vvvv. It allows a better calibration of the beamers view and enables the possibility, to see the end result in a demo renderer. For that, the best method is the reconstruct the real scene, with the real coordinates can be measured and took over in the virtual scene.
For this purpose, simple geometries can be used but that could become very difficult if the object the projection will be shown, is unregularly shaped. In this demo patch, a simple cube is used, which can easily be created within vvvv. For more complex situations we will take a look on another patch provided on the vvv.org homepage.
If everything is calibrated correctly the projection will look undistorted from different angles.

Of course, the Content node, allows you to modify the content. There are no restrictions or borders what kind of content can be used. In this patch, I slightly changed the look and reaction of the content. In the driver node, the input can be changed from the Pc’s microphone, to the Stereo mix from the soundcard. With an increasing loudness, the reaction of the spheres are stronger and the colors change. See the highlighted sections.
The second patch5) from Elliot Woods, who btw. provided a lot of nodes in the vvvv addon pack, is a very nice example patch for creating the 3D environment in vvvv. In this example the software Reconstruct ME is used.
His Tutorial can be found here: http://vvvv.org/contribution/vvvv.tutorials.mapping.3d Please follow the instructions from the first Tutorial video to avoid red nodes.
And the software is as SDK for free available under: http://reconstructme.net/reconstructme-sdk/ It is a very nice possibility to create very quickly a virtual replica of the environment in vvvv. But a Kinect camera is needed.
The third and last Demo-Patch, from the FH Schwäbisch Gmünd shows you a setup with two projectors. In the patch it is nicely visible how to create two different angles for the same object, so you can project on an object or building from two sides. Of course, two projectors are needed for this purpose.
Video Examples
A lot of video examples of projection mapping can be found on: http://videomapping.tumblr.com/
- http://vimeo.com/92411171 –> Keyboard projection
- http://vimeo.com/16627446 –> Eiffel Tower
- http://www.youtube.com/watch?v=UJ7E7uEZN00&feature=kp –> Advertising for the Toyota Auris
- http://www.youtube.com/watch?v=4iGNTegpLZI –> Tokyo City Symphony

