Benutzer-Werkzeuge
Inhaltsverzeichnis
EnvOLamp
System Concept Statement
The EnvOLamp (Environmental Office Lamp) will replace the standard office lamp but it can also be converted to multiple sizes (e.g. for personal use). In contrast to the standard lamp EnvOLamp provides additional functionalities to support the workflow of an office worker. Our system is built on a standard lamp and further enables the user to recognize the air quality in a visual manner. It furthermore shows the progress of an ongoing user defined task, notifies on events or simply lights up the room with the possibility to influence the atmosphere by providing different light colors. The main benefit of EnvOLamp is that the office worker will not be interrupted in his workflow but still gets additional information. The User has also the possibility to signal his availability to his colleagues. With EnvOLamp you can make your office talk to you.
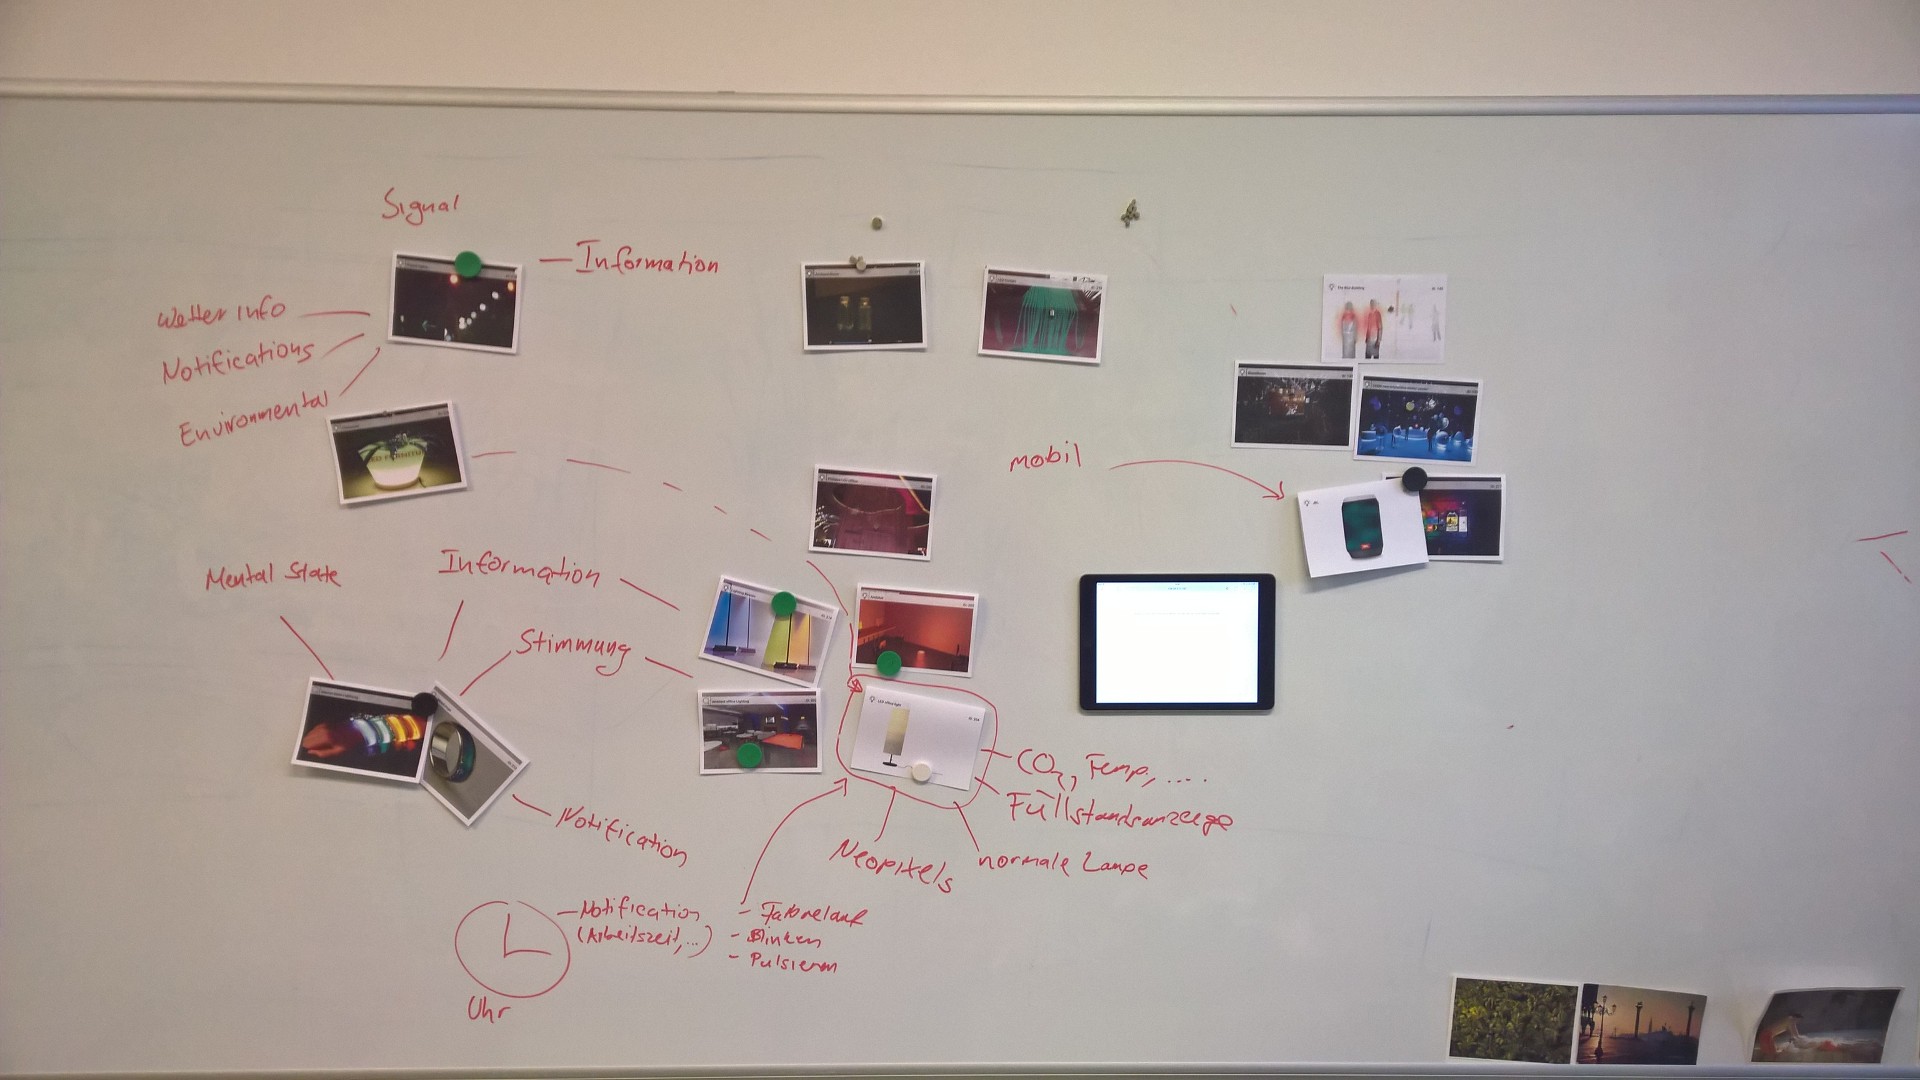
Creativity Workshop
When we conducted the Creativity Workshop, we thought of many things. We thought of rings which can display the users current mental state or Wearables which gives the users usefull information while not distracting them. We decided then, to try to combine many of these ideas in an office lamp. It should provide the Worker with usefull information while not distracting him in his ongoing workflow. Additionally it should visualize things, that are normally not seen with the eye. For example the airquality or the temperature and humidity.
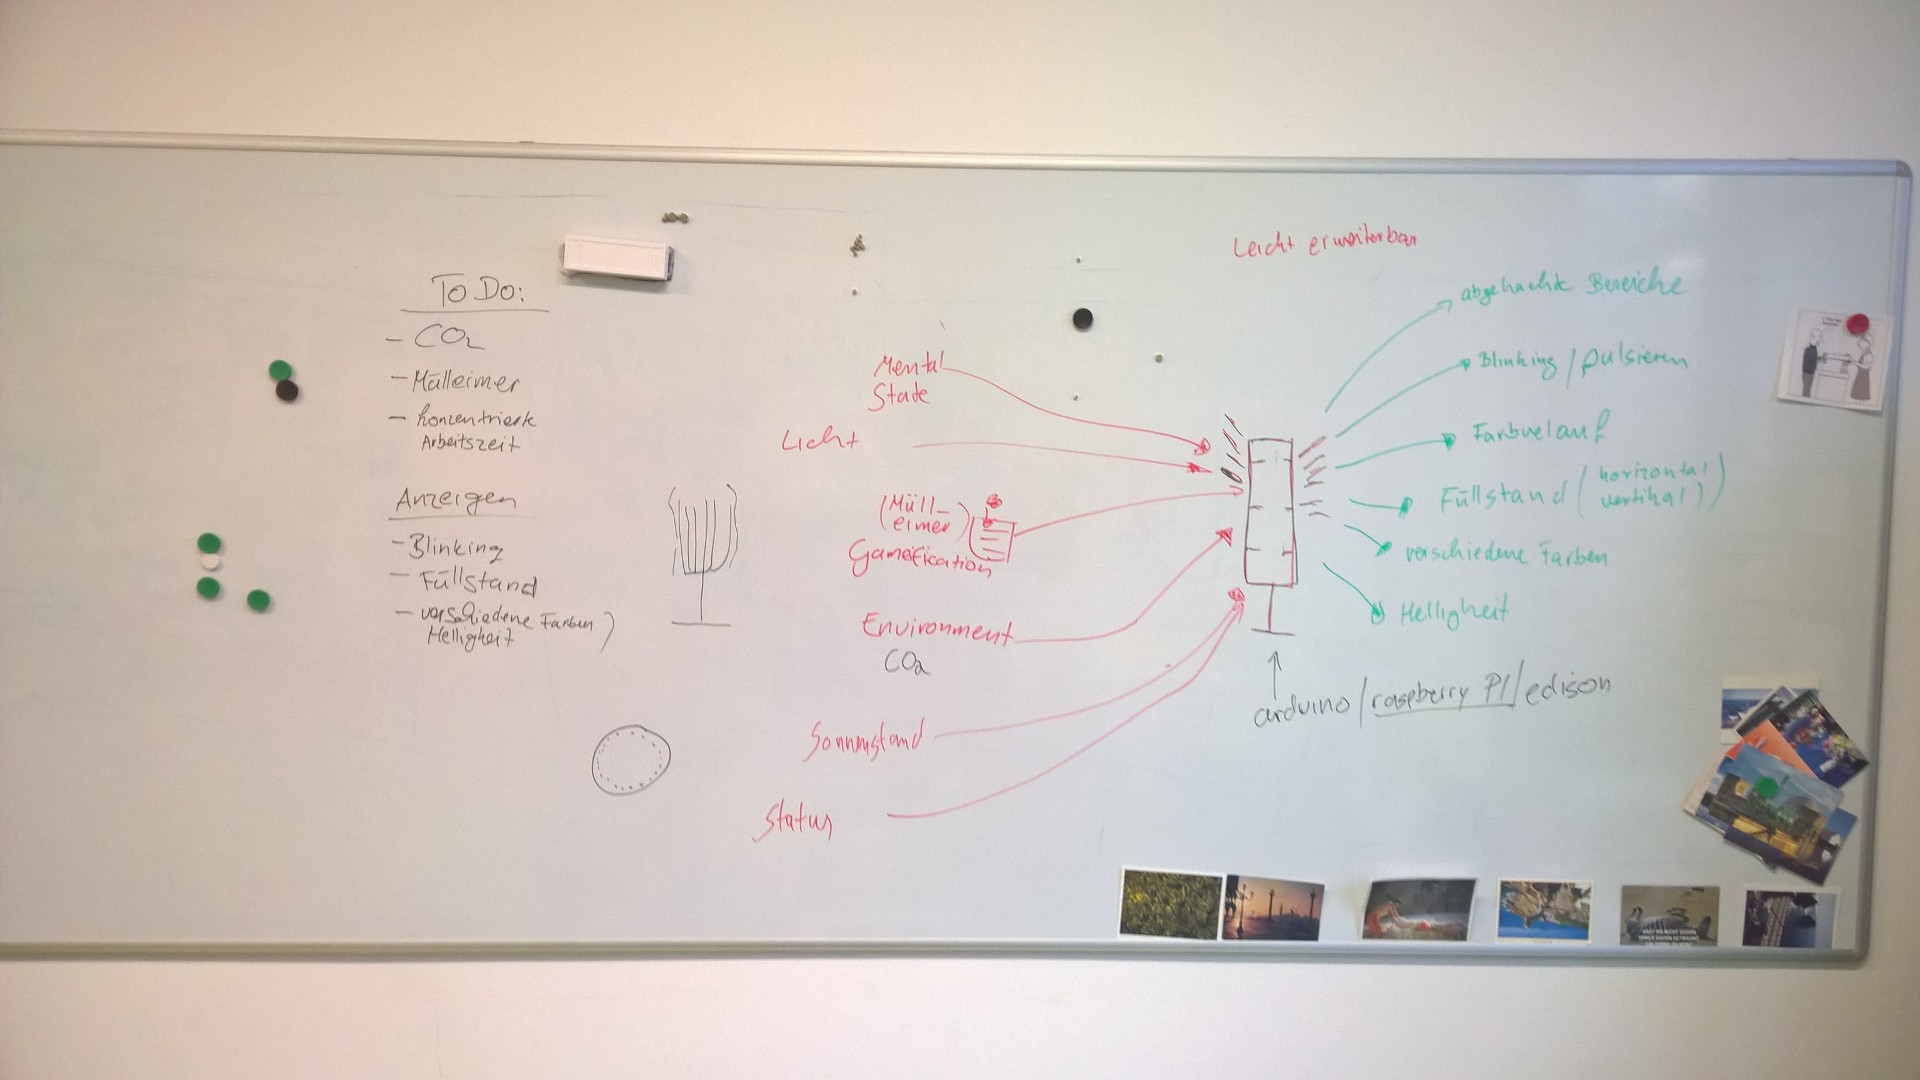
 We then focused on the design and the functions of the lamp. The lamp should be able to sense the airqulity, temperature and humidity and furthermore be able to display it to the user in a not distracting manner. So the big challenge was to find ways, so that the user understands the color Coding and is able to recognize in which state and progress the lamp is in at the moment.
Proceeding
The first step of course was to find out which technical stuff matched best with our ideas. As we already worked with the NeoPixel from Adafruit, it was clear for us, that we would stick with them as the lighting stripes. For our Project they matched perfectly our expectations, because you can easily control ever single LED. Furthermore you can program them in Java Script which was really helpful, cause of the Web-App we wanted to build. For this Web-App a webserver was needed. As the NeoPixel are programable in Java Script a node server was the best match. It enabled us to provide the Web-App and the control of the light stripes in one file. After we decided all the technical stuff, we had still had one difficult question to be answered. How would we build the lamp? We therefore went to the workshops and ask them if they could build it for us. As they agreed in building our lamp, we made some sketches and gave it to them. While they were building our lamp we could already begin to prepare our Microcontroller. For that we decided to use a Raspberry Pi which supported us with the capability to program Java Script and have remote access to it. So the next steps were to install all the required software on the Pi and to setup a HTTP Server which we needed for the communication between the Web-App and the Node.js server. After we then received our lamp we could start wireing the 8 NeoPixel stripes we used. At the beginning we used a 5 Volt 10 Ampere power supply. But we recognized that the NeoPixel were not shining in full brightness. To find out why this is happening was one of the biggest problems we encountered. But after we tried several things for us it was clear that it had to do something with the power supply. As we wired an additional power supply (5Volt 10 Ampere) the problem was solved and our NeoPixel were shining in full brightness. As the wireing was completly setup we could start focusing on the Web-App and the sensors. For the sensors we decided to use a additional microcontroller which could send us the data of the sensors to our HTTP-Server. We made it this way, because it would make no sense to put the sensors into the lamp. Under the lamp screen all the values we would get from the sensors would not reflect the real values in the room. And it also provides the lamp with a high level of mobility. If the user wants to meassure the values in a different room he just has to move the small photon with its sensors and not the whole lamp. And even if he wants to add multiple sensors in different rooms it is possible with our solution.
To track our progress and to ensure a timely completion we made a workplan which you can see in in the Picture below.

Wireing
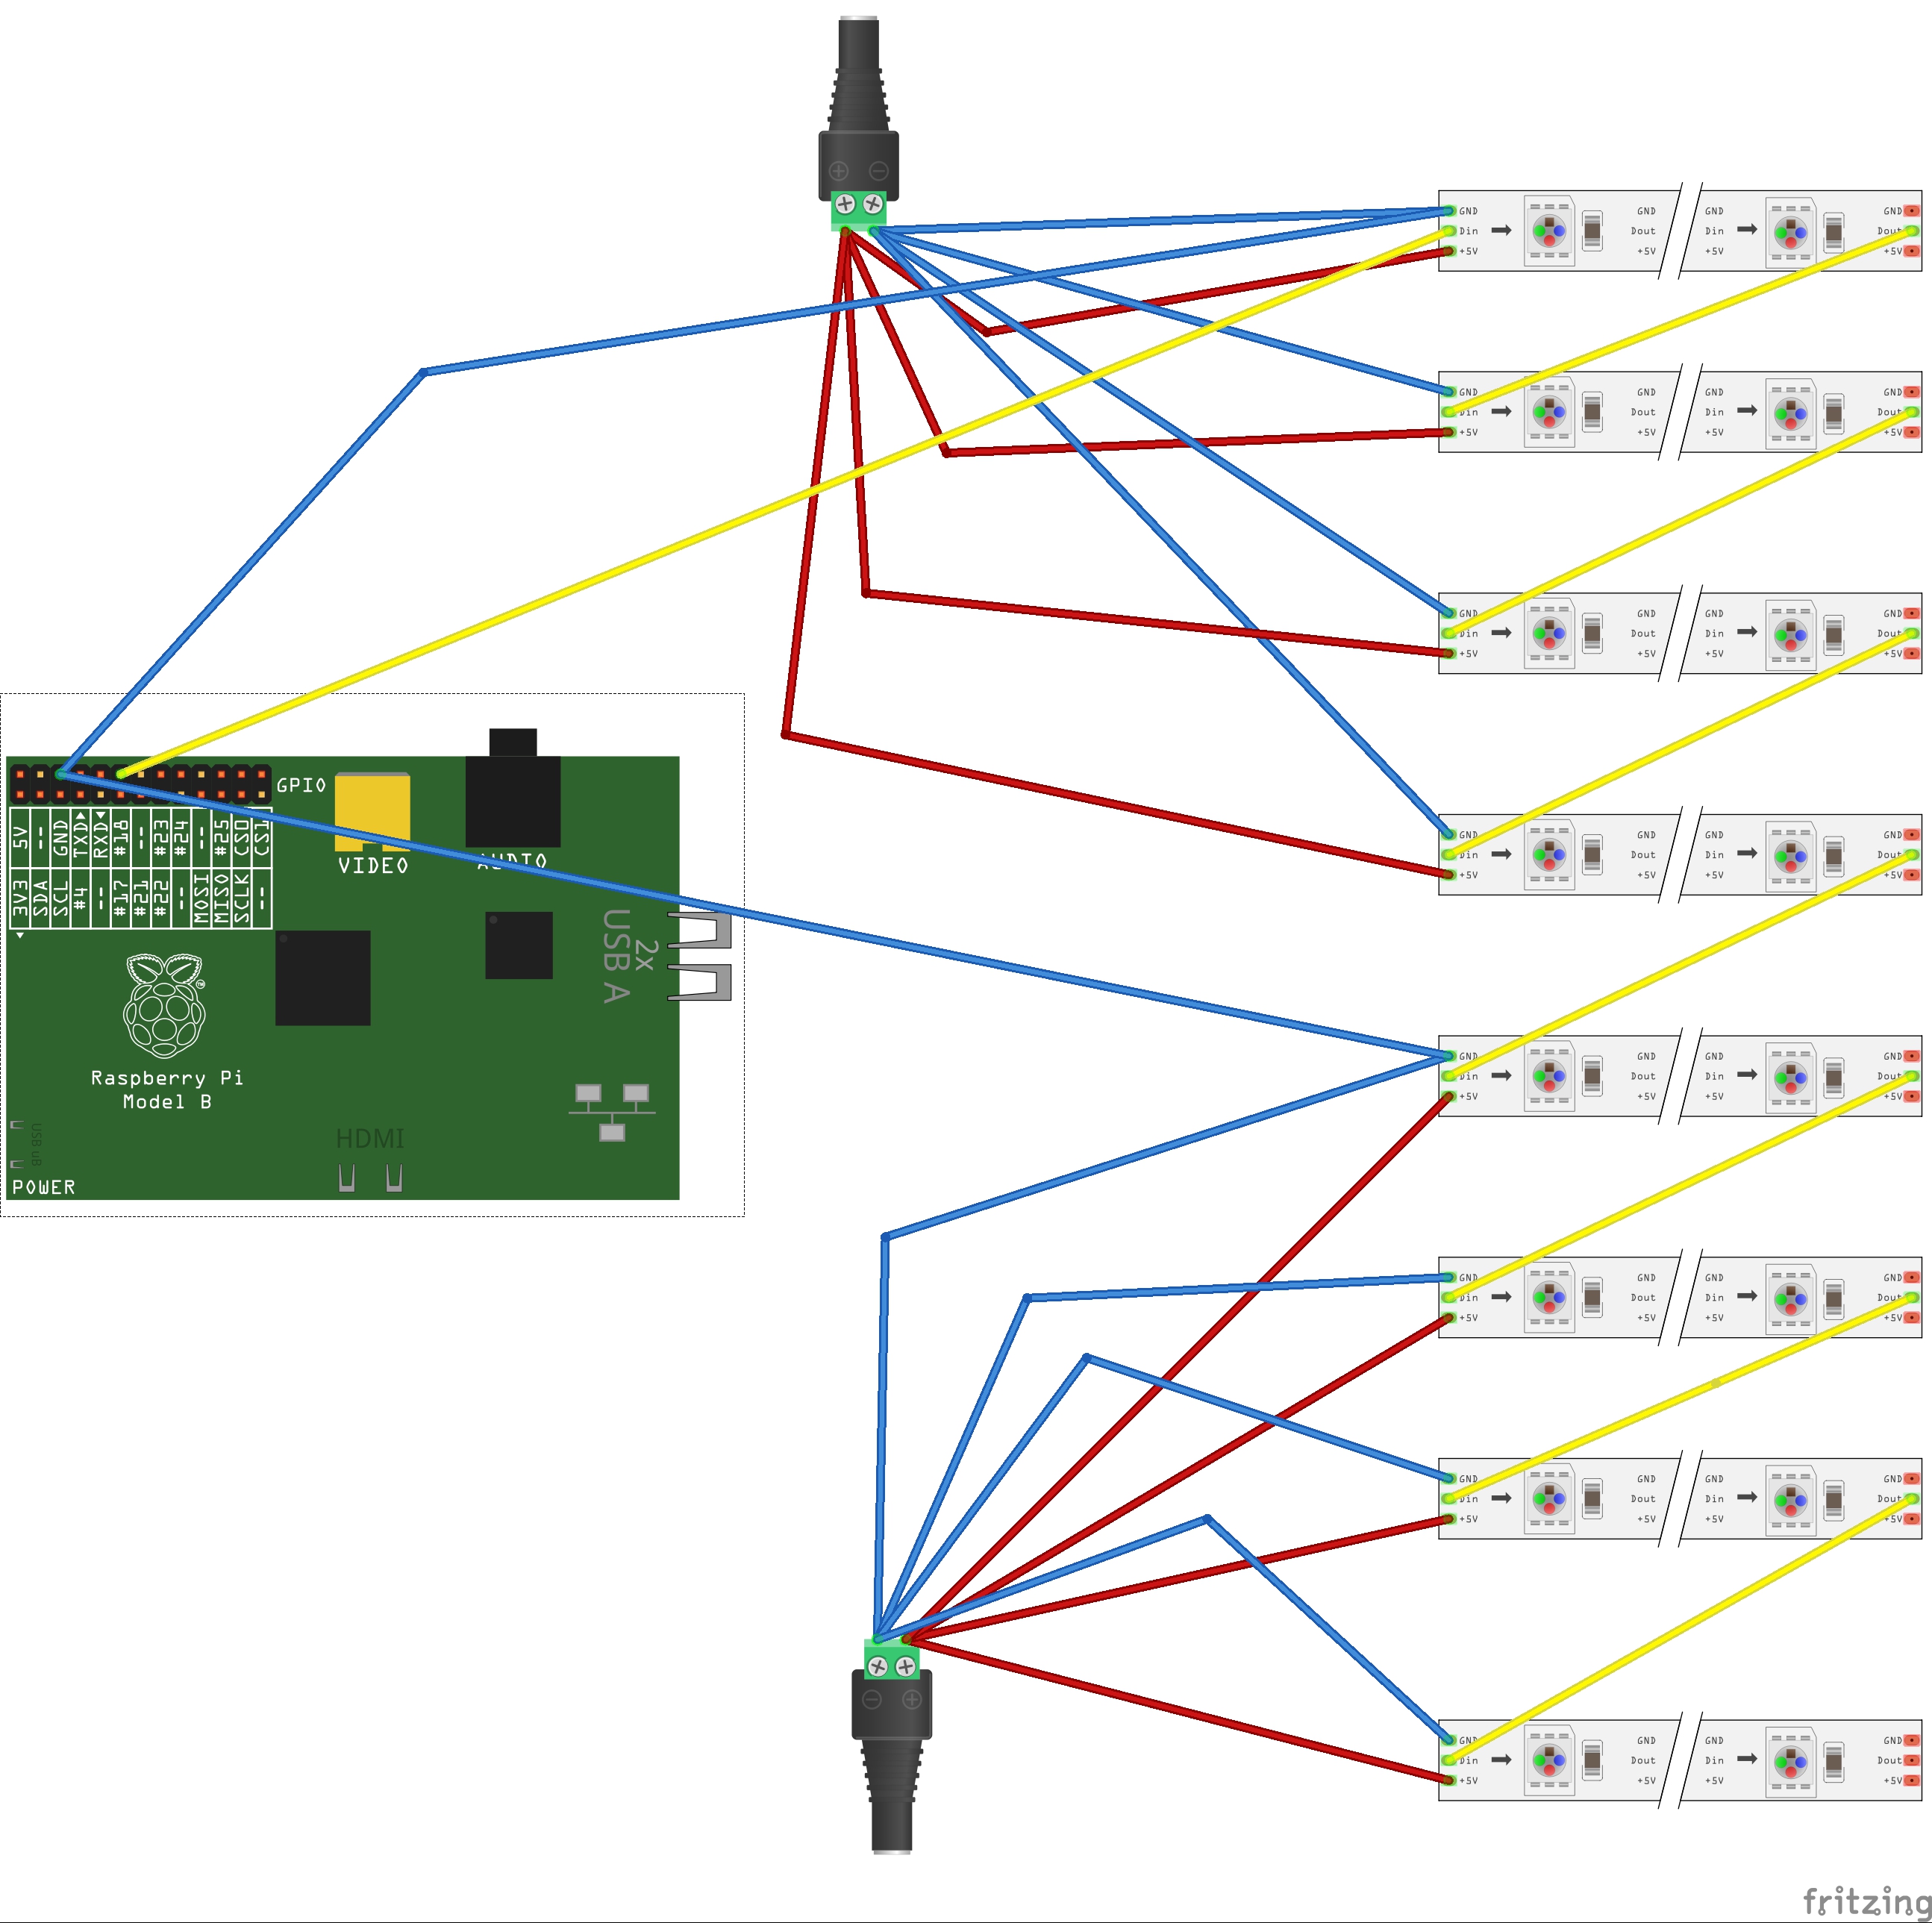
The Wireing is shown in the picture below. As written on the Adafruit site you should always connect a resistor and a capazitor. But we never encountered any problems without it.
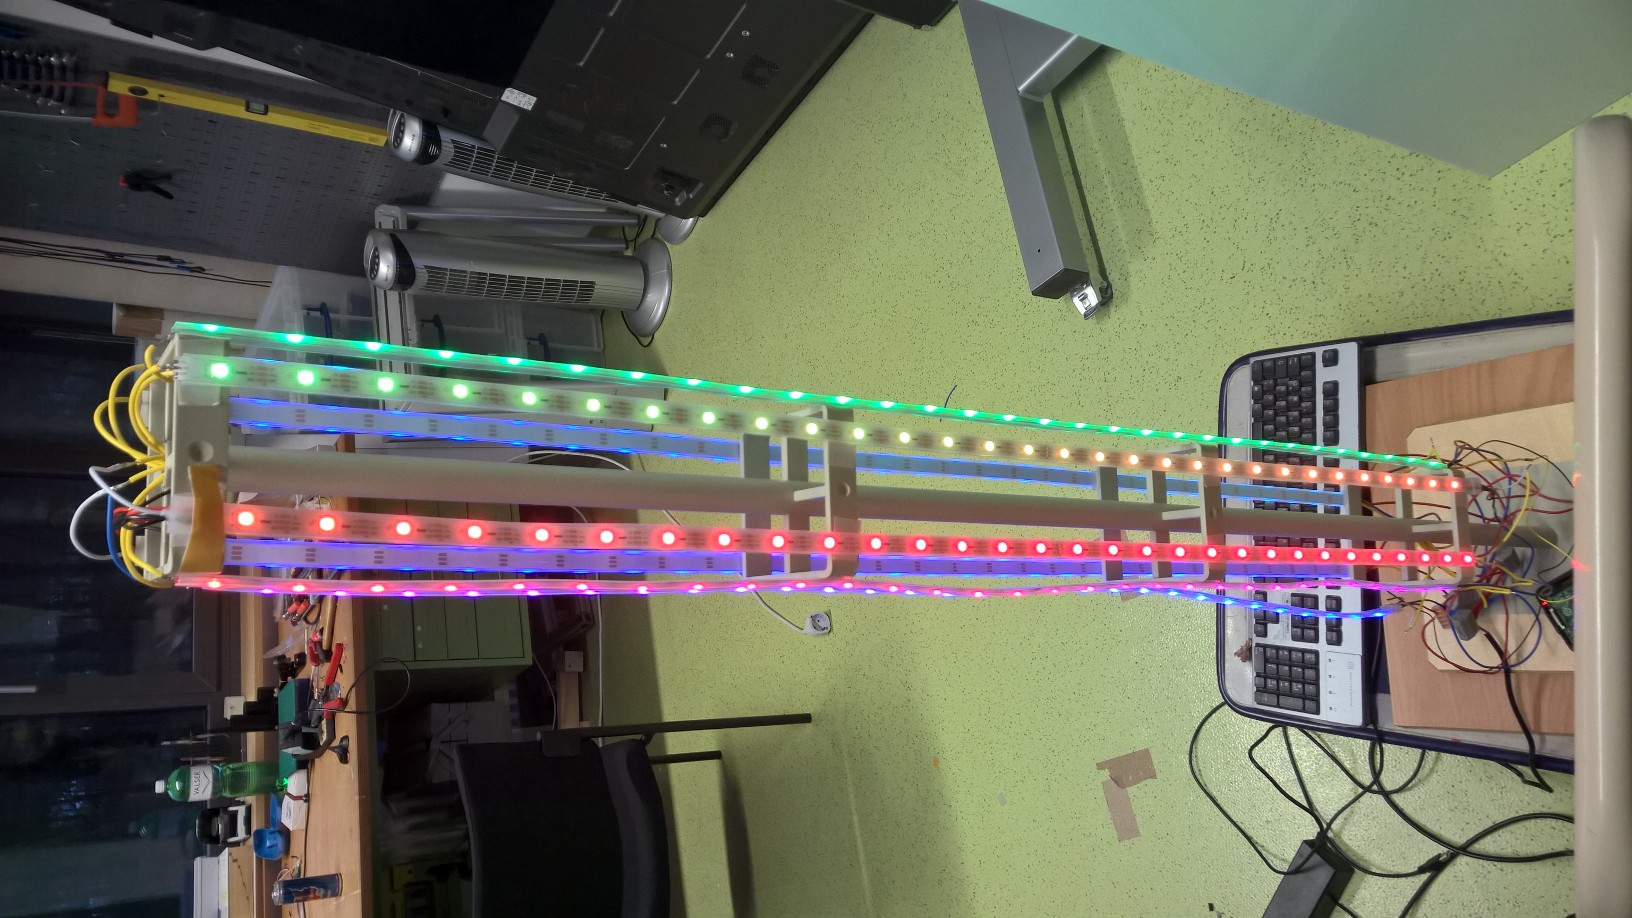
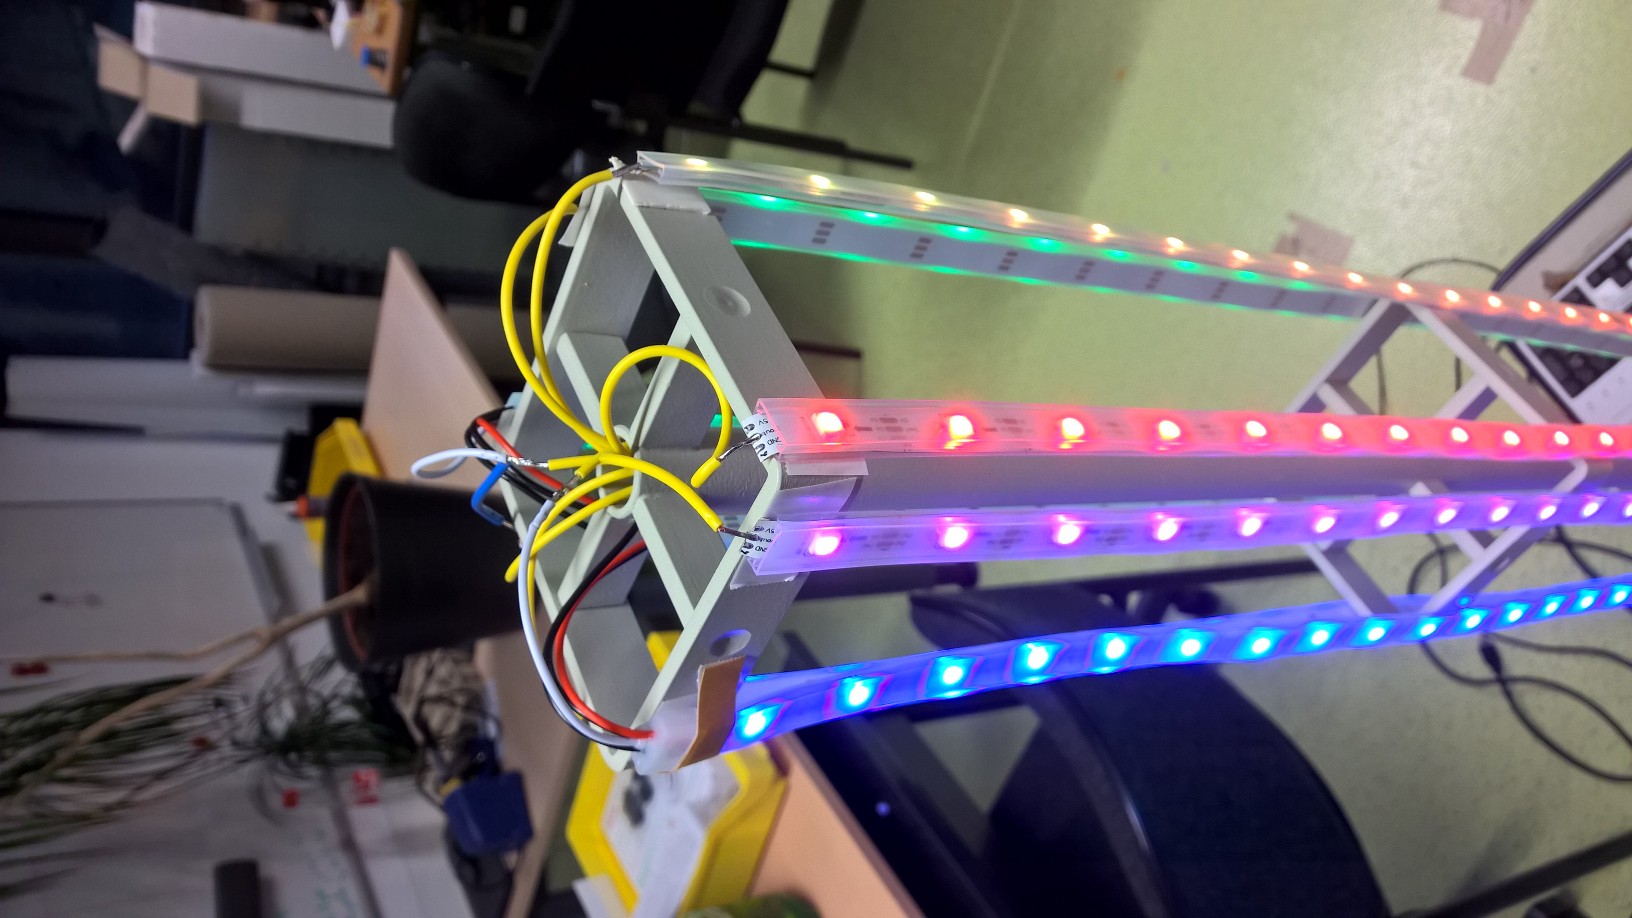
 In the following two pictures you see the final wireing of our prototyp.
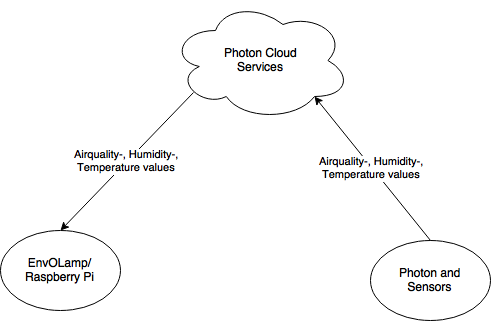
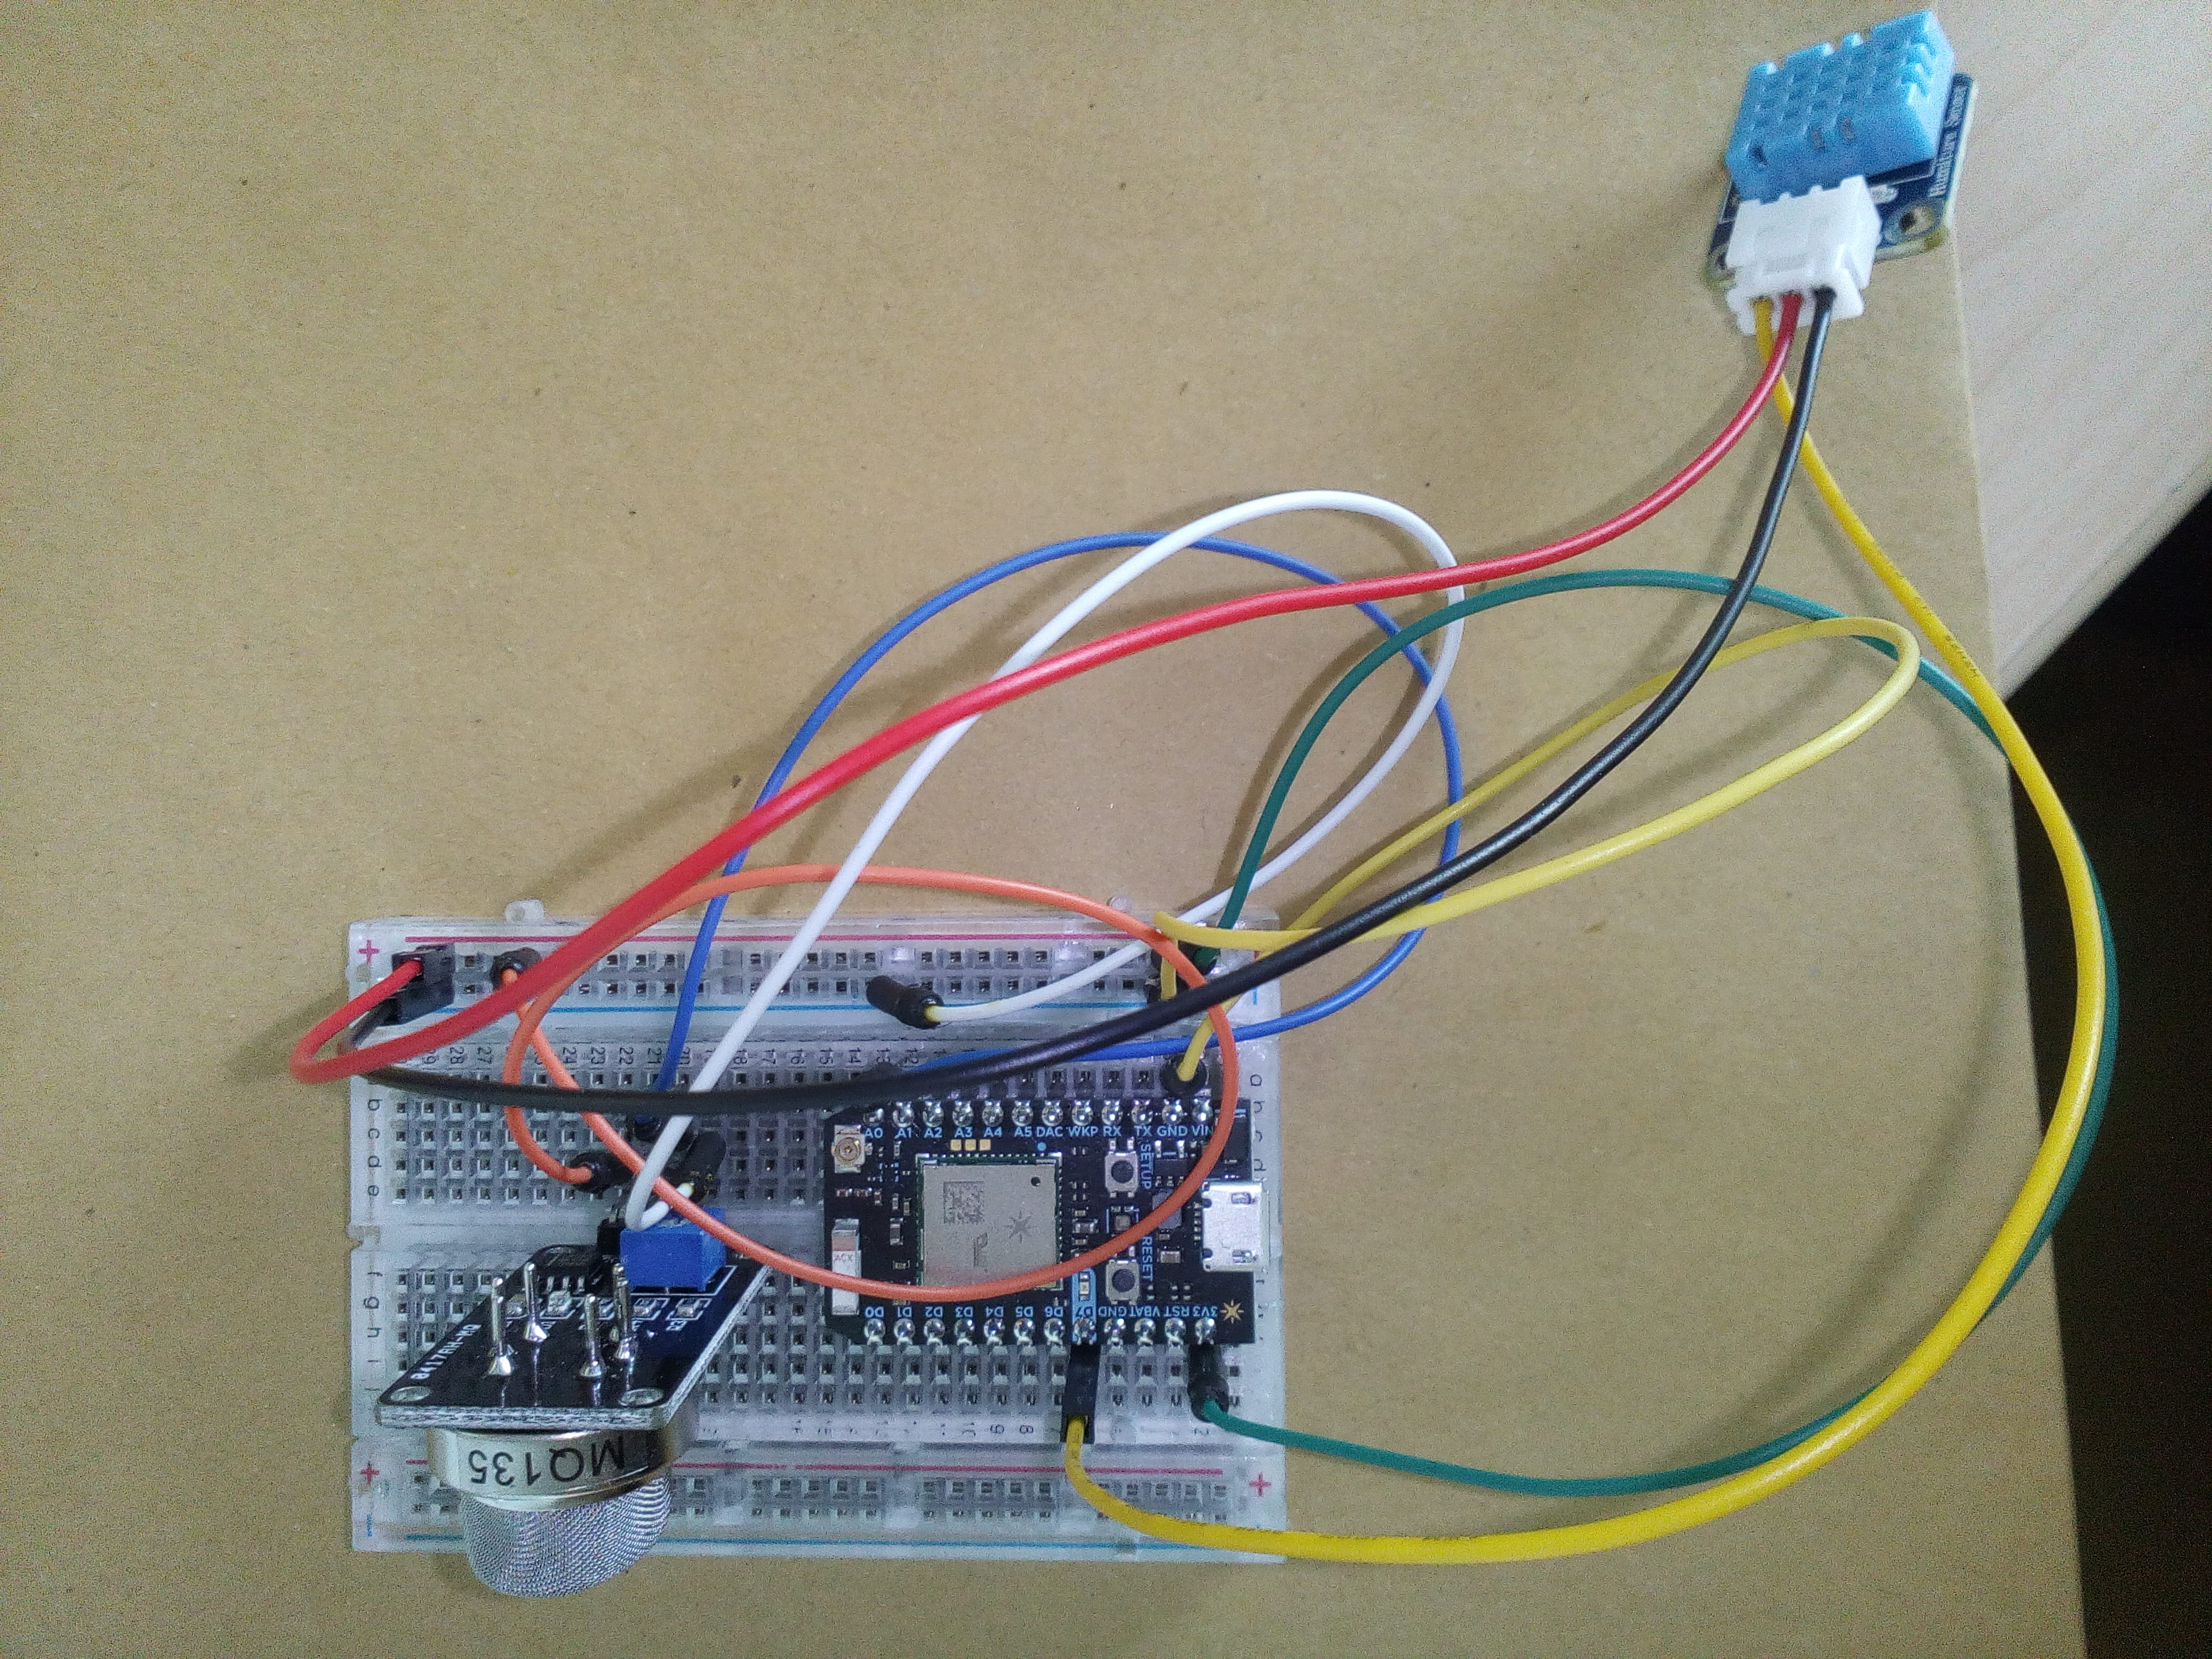
In this picture bellow you see the Particle Photon which is connected to the humiture sensor and the MQ135 airquality sensor.
Setting up Raspberry Pi
To Control the lamp we used the raspberry pi. Further we used a Node.js Server to control the Neo Pixels through a web application. On our Raspberry we used the following Software/Libraries:
- Node.js (version 5.5.0)
- rpi-ws281x-native library to control the Neo Pixel with your Node.js server
- socket.io
- express
Hardware
Raspberry Pi
I microcontroller running linux. It has integrated Wifi and supports JavaScript as programming language. That's the reason why we chose a raspberry pi as the microcontroller.
Photon
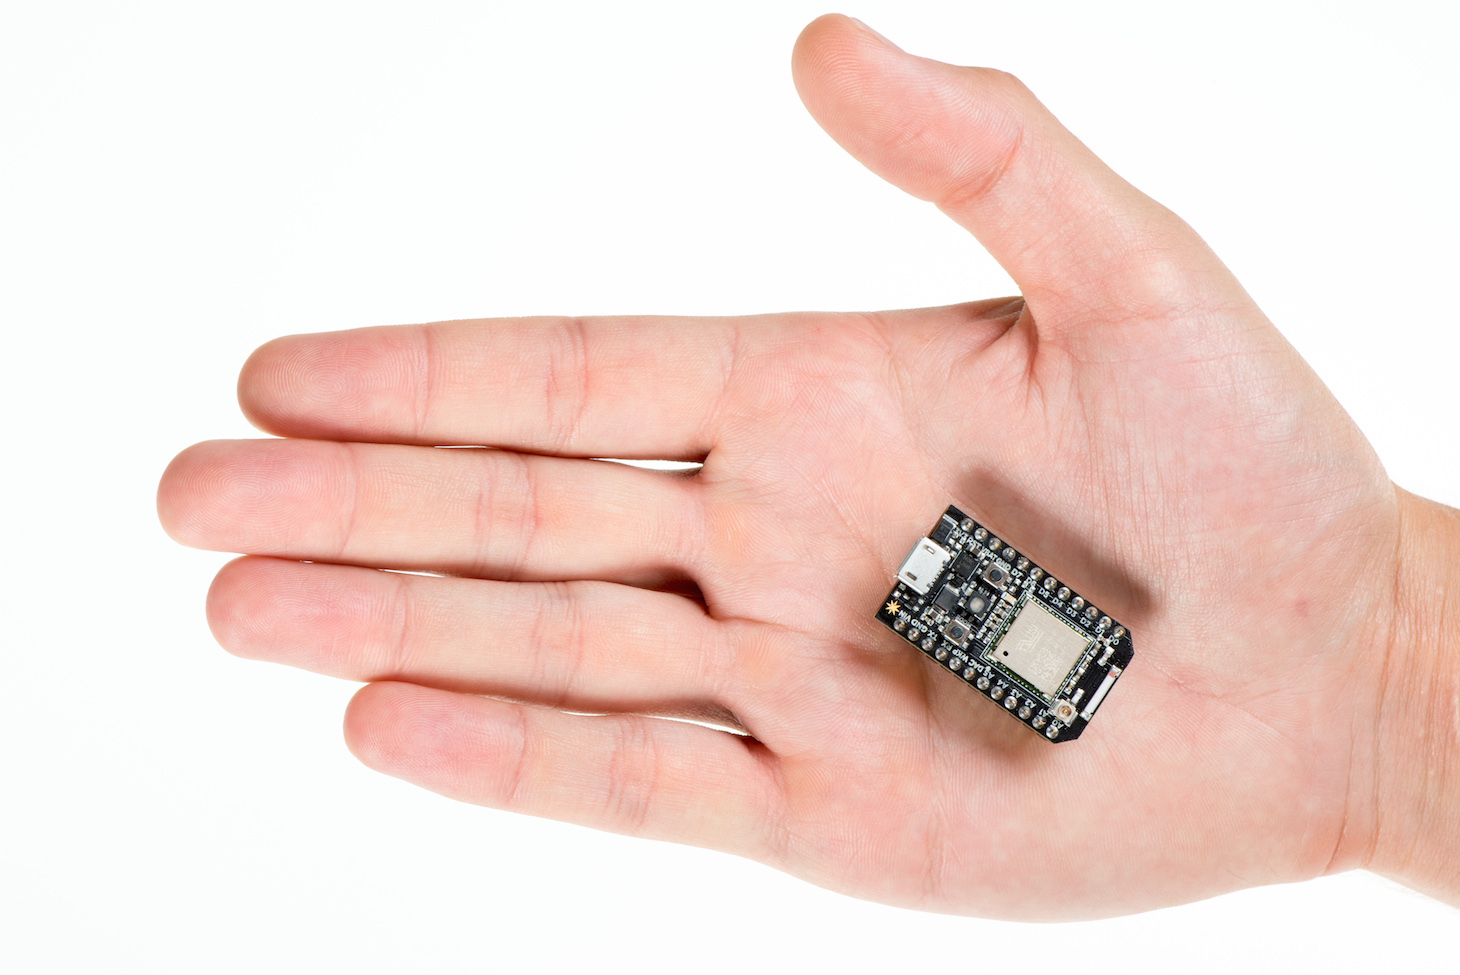 A Photon is a very small microcontroller which provides a cloud based programming interface. As we wanted out sensors to be as mobile as possible, we decided to go for a photon because it pushes all the sensor data into a cloud which we can access from everywhere, where we have an internet connection. In addition it's weight is very low so you can easily move it from one spot to another.
Software
Photon
On the Photon we simply collect all the data from the sensors and push it into a cloud. The code can be found in our git repository.
Node Server
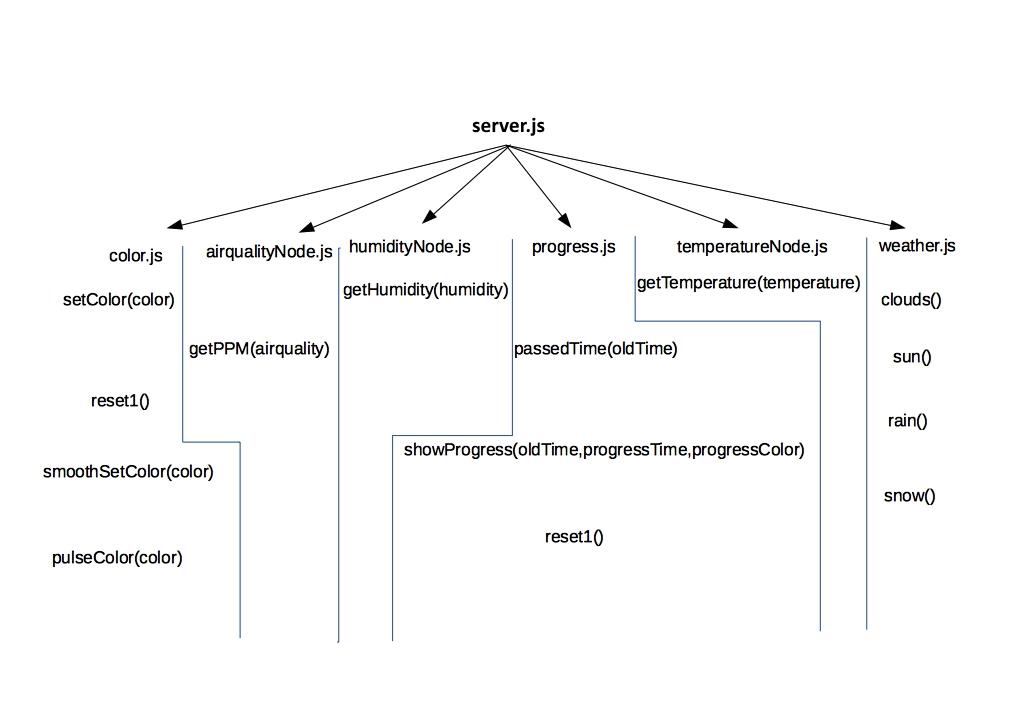
File Structure & Functions
setColor(color)
setColor is the function with which you can directly set your color to the lamp. You only have to provide the function with the desired color with a rgb array. In difference to the following color functions there won't be any animations to set the color on the lamp
reset1()
As reset is already reserved by Java Script we had to name it reset1. This function clears the NeoPixel data array so that you can start new animations without seeing the last used color.
smoothSetColor(color)
This function set the color given to the function to the lamp. It set the color from the bottom to the top with a smooth animation.
pulseColor(color)
This function lets your Color pulse for 4 seconds. At the moment it is only used for the finish animation when the progress.js finishes its task.
airqualityNode.js
getPPM(airquality)
Adds the newest airquality value, received from the Photon, to the airquality array and writes it in an external log file.
humidityNode.js
getHumidity(humidity)
Adds the newest humidity value, received from the Photon, to the humidity array and writes it in an external log file.
progress.js
passedTime(oldTime)
Returns the time already passed since the progress was started.
showProgress(oldTime, progressTime, progressColor)
Shows the progress of the set time on the lamp and checks if its already finished. Needs to receive the time when the progress was started as well as set progressTime and the chosen progressColor.
reset1()
As reset is already reserved by Java Script we had to name it reset1. This function clears the NeoPixel data array so that you can start new animations without seeing the last used color.
temperatureNode.js
getTemperature(temperature)
Adds the newest temperature value, received from the Photon, to the temperature array and writes it in an external log file.
weather.js
clouds()
Draws a cloud animation on the lamp.
sun()
Draws a sun animation on the lamp.
rain()
Draws a rain animation on the lamp. For this there are three raindrop objects created which spawn at a random position in the upper half of the lamp.
snow()
Draws a snow animation on the lamp. For this there are three snowflake objects created which spawn at a random position in the upper half of the lamp.
Web-App
For us it was important do biuld an application which can be used on different devices. So the user can use his smartphone, tablet or Computer to control the lamp. Therefore we decided to build an HTML 5/CSS 3 single page responsive web application. Like you can see in the picture below we sticked to the Windows Metro style design pattern. Every function is represented by a single tile.
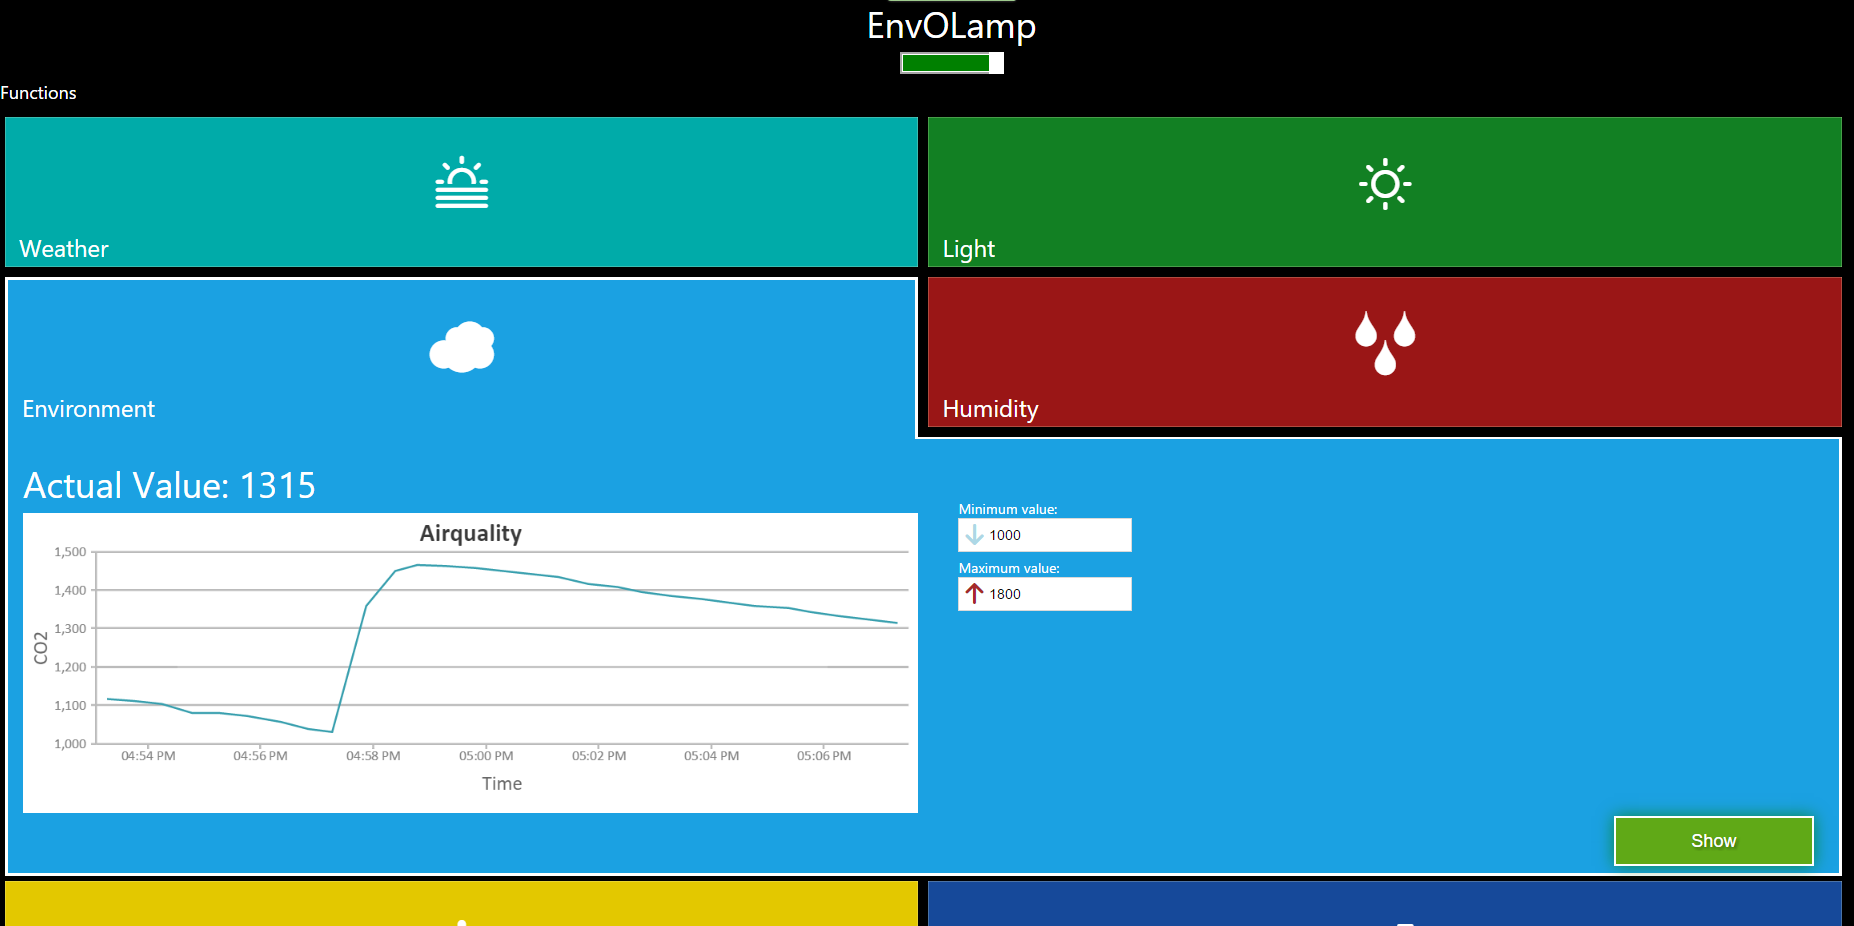
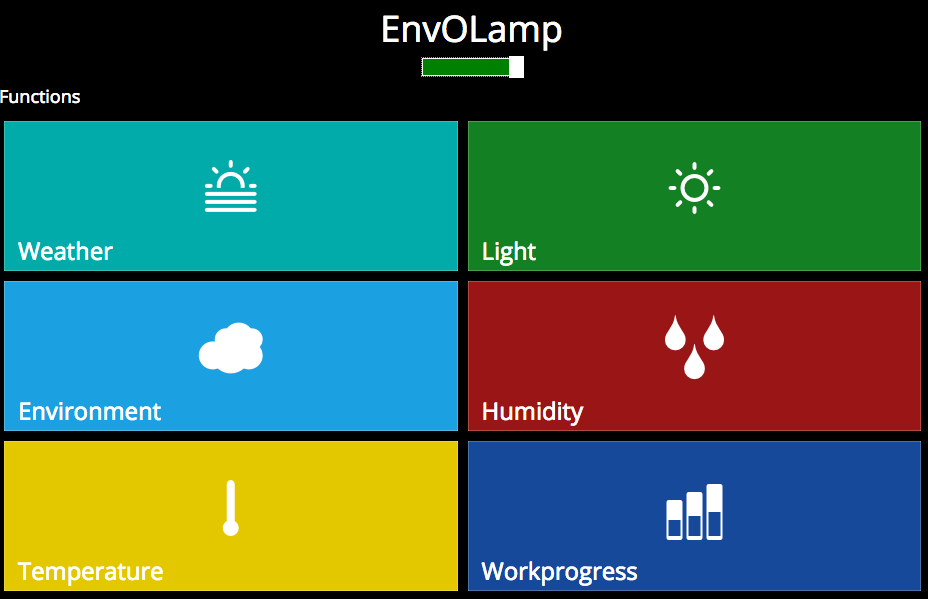 With this design pattern one can easily add new functions to the app without breaking the design. Furthermore we enhanced this design pattern with detail pages. If you choose a function, the Detail pages appears directly below the tile. We used this Detail page on one side to control the lamp (e.g. the light Color or the workprogress), on the other hand one can see the color mapping for the differten senson values and the values it self.
Implemented functions
- Weather - We use the openweather API to get the actual weather. We are able to show 4 different weather states (sunny, clouds, rain, snow)
- Normal light - The user can change the Colors of the lamp
- Airquality -in this function the lamp displays the actual Quality of the room. A bright ligth (lightblue) means a good airquality, a dark light (light brown) means a bad airquality.
- Humidity
- Temperature
- Workprogress - The user can set an amout of time he/she wants to work concentrated and the Color of the lamp. The lamp then displays the procentual elapsed time in the Chosen Color.
Difficulties we encountered
During our work we encountered several difficulties:
- For the wireing we had to choose the right electrical components which should help us to build an parallel electrical circuit.
- It was hard to find an appropriate power supply which provides at least 15A at 5V.
Future Work
There are many features which could be realized with out implementation. For example one could use every side of the lamp to show a weather forecast for the next 4 days or hours or connect the lamp to a brain computing system to show the mental state of a user. There are many more functionalities we could imagine like
- Weather Forecast (4 days, each side one day)
- Connect with Brain Computing
- Gamification
- Environmental Light for Gaming
- Smart Home/Office
- Notification
- …
CODE
You can find the code here.

